Ubuntu 20.04 LTS NIST 800-171 Configuration

NIST 800-171
NIST Special Publication 800-171, titled “Protecting Controlled Unclassified Information in Non-Federal Systems and Organizations,” is a document published by the National Institute of Standards and Technology (NIST), aimed at standardizing the way non-federal entities protect sensitive but unclassified information.
The publication outlines 14 families of security requirements that aim to secure Controlled Unclassified Information (CUI) when it is stored, processed, or transmitted by non-federal systems and organizations.
14 Families of Security Requirements
- Access Control
- Restricting access to CUI through the enforcement of access permissions.
- Awareness and Training
- Ensuring that organizational personnel are adequately trained and aware of security risks.
- Audit and Accountability
- Creating and retaining system audit logs and records to the extent needed to enable the monitoring, analysis, investigation, and reporting of unlawful or unauthorized system activity.
- Configuration Management
- Establishing and maintaining the integrity of organizational systems by applying security configurations and monitoring changes.
- Identification and Authentication
- Ensuring the identity of users and processes that access organizational systems.
- Incident Response
- Establishing an operational incident handling capability for organizational systems.
- Maintenance
- Performing timely maintenance of organizational systems.
- Media Protection
- Protecting system media containing CUI, both paper and digital.
- Physical Protection
- Limiting physical access to organizational systems and the facilities in which they are housed.
- Personnel Security
- Ensuring that individuals occupying positions of responsibility within organizations are trustworthy and meet established security criteria.
- Risk Assessment
- Conducting assessments of risks to organizational operations, assets, and individuals.
- Security Assessment
- Assessing the security controls in organizational systems to determine their effectiveness.
- System and Communications Protection
- Monitoring, controlling, and protecting organizational communications at the external boundaries and key internal boundaries of information systems.
- System and Information Integrity
- Identifying, reporting, and correcting information and information system flaws in a timely manner.
Overview of the Build Steps
- Install fresh Ubuntu 20.04 LTS system
- Preconfigure the system for compliance
- Run SCAP agent against OS
- Collect results to compare and define steps needed for compliance
- Run SCAP for verification
- Fix the non-compliant issues
- Repeat steps 3 through 6 as needed
Fresh Ubuntu 20.04 LTS Installation
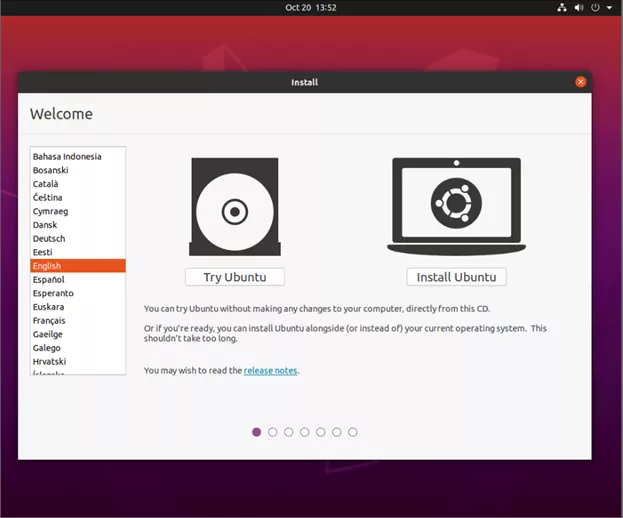
1. Install Ubuntu 20.04 via DVD, ISO, or USB
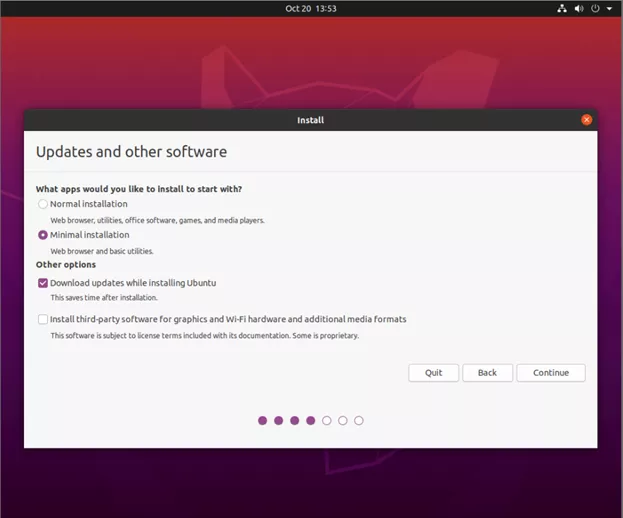
2. If an internet connection is available, choose Download updates while installing Ubuntu. Also choose Install third-party software for graphics… if specialized drivers are needed for hardware.
3. If there is only one drive in the system, use the default setting to configure the drive and choose Advanced Features to enable LVM with encryption. Otherwise, configure the partitions and encrypted volumes under Something Else.
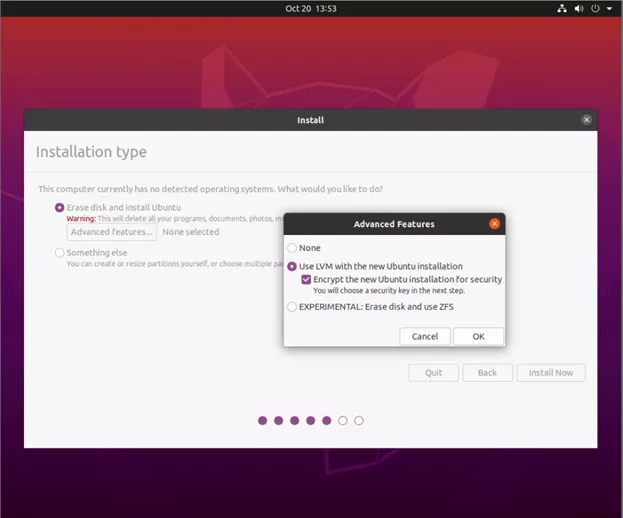
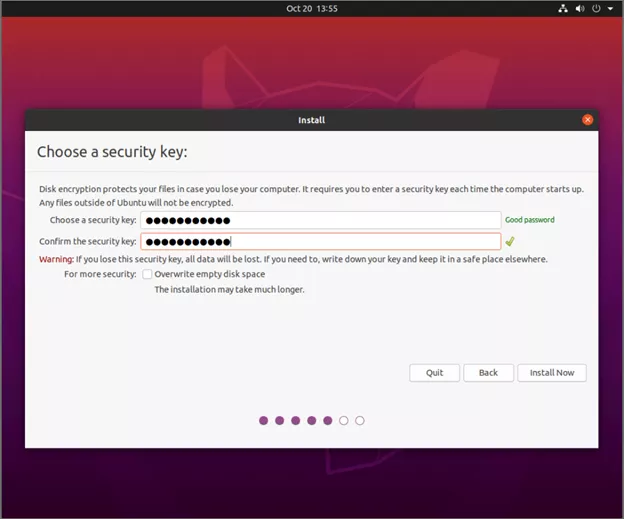
4. In the LVM/Encryption screen, enter a very long complex password that will be used to encrypt the drive. The password should be at least 16 characters long. Store the password in a secured place. - Note: Once TPM boot is configured, the encryption password will only be used for emergency recovery.
5. Choose Install Now once storage is configured. Next, choose Continue to write changes to disks.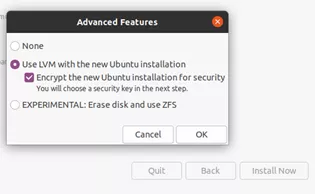
6. Choose the correct time zone for the system.
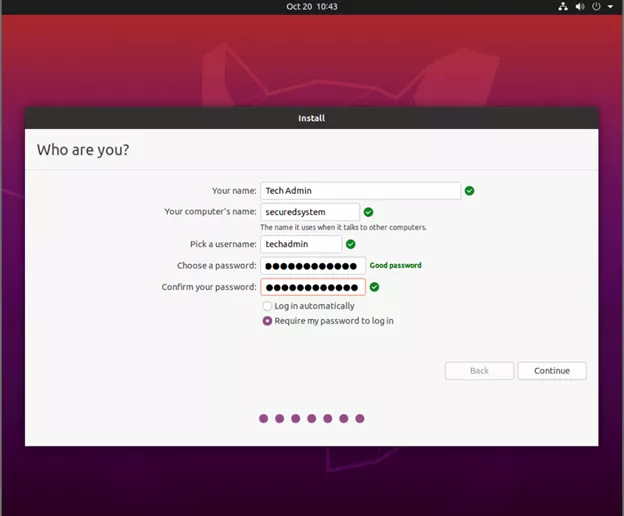
7. The account created at this step will be used as the Local Admin account for the system. The computer name is also entered here, following the standards required for the group.
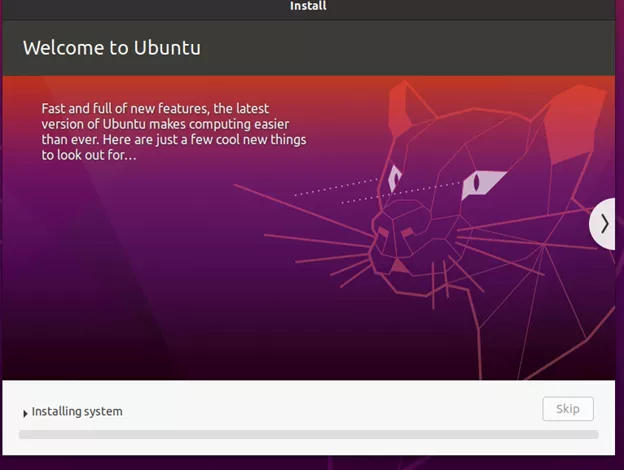
8. The system wil begin the install. Once completed, allow it to reboot.
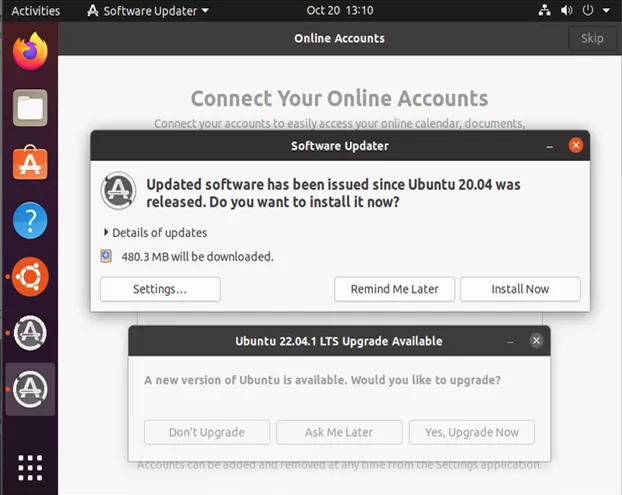
9. Do not upgrade or update the system at this point. Upgrading will change the system to version 22.04, which is not supported. The Software Updater will not add the necessary features needed. Choose Remind Me Later and Don’t Upgrade.
10. Press Skip to continue the installation process.
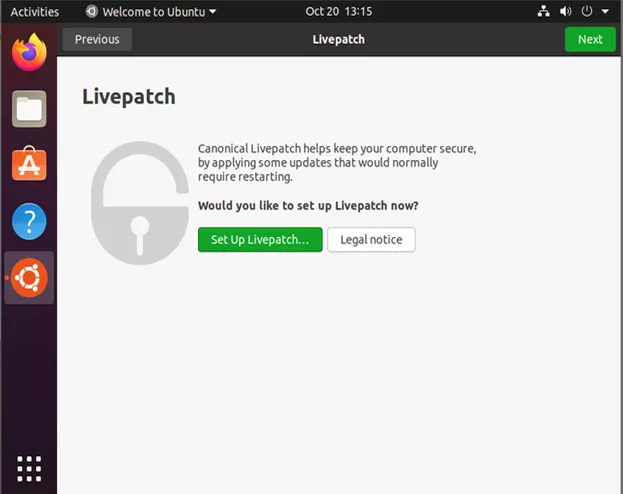
11. Click Next to skip the Livepath option, if the system does not have a Canonical license.
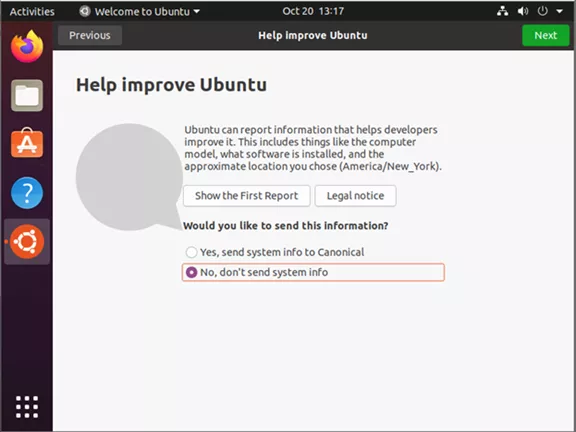
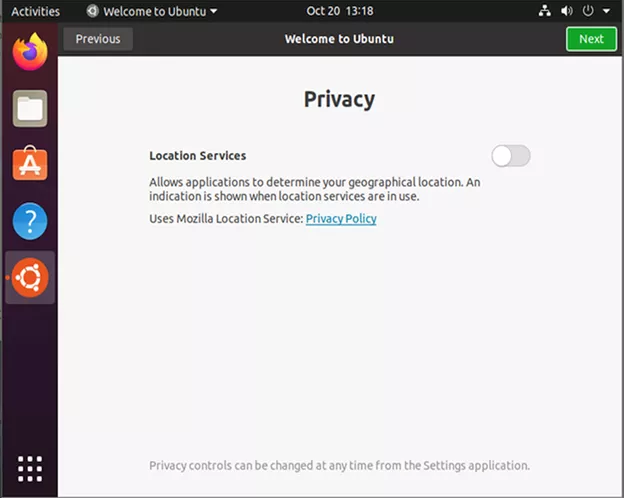
12. Click No and then Next to avoid sending information to Canonical. Click Next and leave location servic disabled. Next, click Done.
Prep System for Hardening
13. Click the Show Applications button on the lower left and type in Terminal to start the application.
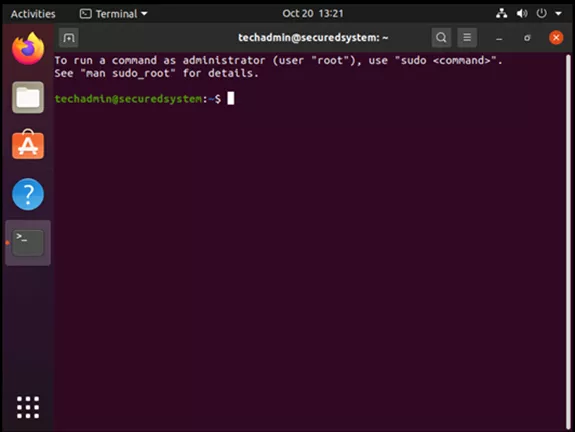
14. Update the system files and upgrade any files. - Note: Most of the following commands will require SUDO mode
1
2
sudo apt update
sudo apt upgrade

15. Install the following packages needed for hardening, then remove old packages.
- Note: For postfix options, choose the option Local Installation and name the current computer name the same as the DNS name.
1
2
sudo apt install libopenscap8 vlock libpam-pkcs11 libpam-pwquality opensc-pkcs11 chrony clamav unattended-upgrades auditd aide
sudo apt autoremove
16. Install OpenSSH server if remote access to the system is required.
- Note: This step must be done before the hardening script below in order to make sure that hardening steps are applied.
1
sudo apt install openssh-server
17. Set the login notification messages for local and remote logins.
1
2
echo 'You are accessing a system that is provided for authorized use only. By using this system, you consent to the acceptable use policy.' >> /etc/issue
echo 'You are accessing a system that is provided for authorized use only. By using this system, you consent to the acceptable use policy.' > /etc/issue.net
18. Set the timeout, login notification messages, and USB mount handling for the GUI session
- Note: this is specifically for the GDM session manager. Research will be needed to change the setting for KDE or other managers. They are not needed if the system does not have a GUI. These commands must be run in a terminal session of the GUI to work properly.
1
2
3
4
5
6
7
sudo -i
xhost +SI:localuser:gdm
sudo -u gdm gsettings set org.gnome.login-screen disable-user-list true
sudo -u gdm gsettings set org.gnome.login-screen banner-message-enable true
sudo -u gdm gsettings set org.gnome.login-screen banner-message-text 'You are accessing a system that is provided for authorized use only. By using this system, you consent to the acceptable use policy.'
sudo -u gdm gsettings set org.gnome.desktop.media-handling automount false
exit
DoD STIG Based Fixes
- Fixes from v18.04
- rule_sysctl_fs_suid_dumpable
- rule_sysctl_kernel_randomize_va_space
- DoD STIGs
- xccdf_mil.disa.stig_rule_SV-238202r653781_rule
- Set password rules
- xccdf_mil.disa.stig_rule_SV-238209r653802_rule
- Change permissions on rule file
- xccdf_mil.disa.stig_rule_SV-238210r653805_rule
- xccdf_mil.disa.stig_rule_SV-238210r653805_rule (SSH)
- xccdf_mil.disa.stig_rule_SV-238212r653811_rule
- xccdf_mil.disa.stig_rule_SV-238213r653814_rule
- xccdf_mil.disa.stig_rule_SV-238216r654316_rule
- xccdf_mil.disa.stig_rule_SV-238217r832940_rule
- xccdf_mil.disa.stig_rule_SV-238218r653829_rule
- xccdf_mil.disa.stig_rule_SV-238219r653832_rule
- xccdf_mil.disa.stig_rule_SV-238220r653835_rule
- xccdf_mil.disa.stig_rule_SV-238221r653838_rule
- xccdf_mil.disa.stig_rule_SV-238222r653841_rule
- xccdf_mil.disa.stig_rule_SV-238223r653844_rule
- xccdf_mil.disa.stig_rule_SV-238226r653853_rule
- xccdf_mil.disa.stig_rule_SV-238225r832942_rule
- xccdf_mil.disa.stig_rule_SV-238227r653856_rule
- xccdf_mil.disa.stig_rule_SV-238228r653859_rule
- xccdf_mil.disa.stig_rule_SV-238237r653886_rule
- xccdf_mil.disa.stig_rule_SV-238357r654246_rule
- xccdf_mil.disa.stig_rule_SV-238201r832933_rule
- xccdf_mil.disa.stig_rule_SV-238249r653922_rule
- xccdf_mil.disa.stig_rule_SV-238250r653925_rule
- xccdf_mil.disa.stig_rule_SV-238251r653928_rule
- xccdf_mil.disa.stig_rule_SV-238330r654165_rule
- Disable accounts after 60 days
- xccdf_mil.disa.stig_rule_SV-238337r654186_rule
- xccdf_mil.disa.stig_rule_SV-238340r654195_rule
- Harden log files
Note:
- “xccdf_mil.disa.stig_rule_SV-238363r654320_rule” cannot be configured without a Ubuntu subscription. However, this documentation activates and forces FIPS level encryption
- “xccdf_mil.disa.stig_rule_SV-238330r654165_rule” is configured by the script to 60 days as opposed to the DOD documentation of 180
19. Run the following fixes as root to manually resolve STIG rules based on the rules listed above
1
2
3
4
5
6
7
8
9
10
11
12
13
14
15
16
17
18
19
20
21
22
23
24
25
26
27
28
29
30
31
32
33
34
sudo bash
sudo echo 'fs.suid_dumpable = 0' >> /etc/sysctl.d/10-kernel-hardening.conf
sudo echo 'kernel.randomize_va_space = 2' >> /etc/sysctl.d/10-kernel-hardening.conf
sudo sed -i 's/PASS_MIN_DAYS.*0/PASS_MIN_DAYS 1/g' /etc/login.defs
sudo sed -i 's/PASS_MAX_DAYS.*99999/PASS_MAX_DAYS 60/g' /etc/login.defs
sudo sed -i 's/UMASK.*022/UMASK 077/g' /etc/login.defs
sudo sed -i 's/end of pam-auth-update config/\nFIX xccdf_mil\.disa\.stig_rule_SV-238210r653805/g' /etc/pam.d/common-auth
sudo echo 'auth [success=2 default=ignore] pam_pkcs11.so' >>  /etc/pam.d/common-auth
sudo echo 'end of pam-auth-update config' >>  /etc/pam.d/common-auth
sudo echo 'PubkeyAuthentication yes' >> /etc/ssh/sshd_config
sudo echo 'Ciphers aes256-ctr,aes192-ctr,aes128-ctr' >> /etc/ssh/sshd_config
sudo echo  'MACs hmac-sha2-512,hmac-sha2-256' >> /etc/ssh/sshd_config
sudo echo 'ClientAliveCountMax 1' >> /etc/ssh/sshd_config
sudo echo 'ClientAliveInterval 600' >> /etc/ssh/sshd_config
sudo echo 'PermitEmptyPasswords no' >> /etc/ssh/sshd_config
sudo echo 'PermitUserEnvironment no' >> /etc/ssh/sshd_config
sudo sed -i 's/X11Forwarding\ yes/X11Forwarding\ no/g' etc/ssh/sshd_config
sudo echo 'X11UseLocalhost yes' >> /etc/ssh/sshd_config
sudo echo 'ucredit=-1' >> /etc/security/pwquality.conf
sudo echo 'lcredit=-1' >> /etc/security/pwquality.conf
sudo echo 'dcredit=-1' >> /etc/security/pwquality.conf
sudo echo 'ocredit=-1' >> /etc/security/pwquality.conf
sudo echo 'difok=8' >> /etc/security/pwquality.conf
sudo echo 'minlen=15' >> /etc/security/pwquality.conf
sudo echo 'dictcheck=1' >> /etc/security/pwquality.conf
sudo echo 'enforcing=1' >> /etc/security/pwquality.conf
sudo echo 'auth required pam_faildelay.so delay=4000000' >> /etc/pam.d/common-auth
sudo     sudo sed -i 's/makestep\ 1\ 3/makestep\ 1\ -1/g' /etc/chrony/chrony.conf
sudo cp /usr/share/doc/libpam-pkcs11/examples/pam_pkcs11.conf.example /etc/pam_pkcs11/pam_pkcs11.conf
sudo chmod -R 0640 /etc/audit/audit*.{rules,conf} /etc/audit/rules.d/*
sudo chown root /etc/audit/audit*.{rules,conf} /etc/audit/rules.d/*
sudo useradd -D -f 60
sudo find /var/log -perm /137 -type f -exec chmod 640 '{}' \;
sudo chmod 0750 /var/log
OpenSCAP Configuration and Fix
20. Create a folder to hold the guides and configuration scripts. Then, download the Ubuntu SCAP guide from the DoD website. Unzip the downloaded file.
1
2
3
4
mkdir openscap
cd openscap
wget https://dl.dod.cyber.mil/wp-content/uploads/stigs/zip/U_CAN_Ubuntu_20-04_LTS_V1R8_STIG_SCAP_1-2_Benchmark.zip
unzip U_CAN_Ubuntu_20-04_LTS_V1R8_STIG_SCAP_1-2_Benchmark.zip
21. Create a preliminary report and result file using the DoD STIG profile.
- Note: XXXXXX is to be replaced by today’s date in the YYMMDD format; ex 221019
1
2
3
4
5
6
oscap xccdf eval \
--profile xccdf_mil.disa.stig_profile_MAC-2_Sensitive \
--fetch-remote-resources \
--results openscap_NIST800171_results-install.xml \
--report openscap_NIST800171_report_XXXXXX-pre.html \
U_CAN_Ubuntu_20-04_LTS_V1R8_STIG_SCAP_1-2_Benchmark.xml
22. Generate a fix file using the previously generated results file.
1
2
3
4
sudo oscap xccdf generate fix \
--fix-type bash --result-id xccdf_mil.disa.stig_profile_MAC-2_Sensitive \
U_CAN_Ubuntu_20-04_LTS_V1R8_STIG_SCAP_1-2_Benchmark \
> openscap_NIST800171-fix.sh
23. Run the generated fix file in a roow environment.
1
2
3
sudo bash
sh ./openscap_NIST800171-fix.sh
exit
24. Generate a “post fix” report to find what fixes require manual modifications
- Note: XXXXXX is to be replaced by today’s date in the YYMMDD format; ex 221019
1
2
3
4
5
oscap xccdf eval \
--profile xccdf_mil.disa.stig_profile_MAC-2_Sensitive \
--fetch-remote-resources \
--report openscap_NIST800171_report_XXXXXX-post.html \
U_CAN_Ubuntu_20-04_LTS_V1R8_STIG_SCAP_1-2_Benchmark.xml
Manual Fixes
The “openscap_NIST800171_report_XXXXXX-post.html” file that is generated is a HTML file that can be viewed in Mozilla Firefox or Google Chromium.
It contains the results of the security scan, states what changes need to be made, and how to make them.
Some of the fixes required cannot be done via a simple shell command but instead need to be done manually. An example is below:
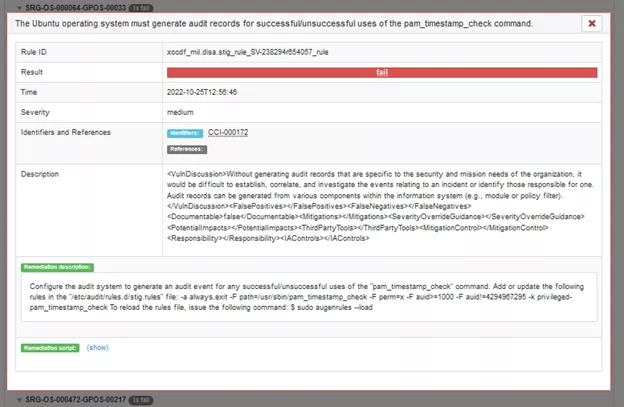
The section Remediation Description explains what changes need to be made to the system to resolve the failure.
25. After all the changes are made manually, re-run the post report (Step 24) and verify the results.
- Any future configurations of the system require that the security scan is again completed from Step 24
Locking GRUB Boot Screen
It is important to set a password for the GRUB boot screen to prevent changes to the boot environment - Note: The following commands must be run in a root environment due to the file redirection required.
- Generate an encrypted password by running:
1
 grub-mkpasswd-pbkdf2
On the prompt enter your desired grub password
- The output should look somewhat like the following:
1
 Your PBKDF2 is grub.pbkdf2.sha512.10000.FC8373BCA15ATAN515ANRTT1516159AVVNTEAT41864TWATV74AFW44868WAF4884FWA4AJKY48
- Copy the “grub.pbkdf2.sha512……” section of the output
- Run the following command:
1
sudo nano /etc/grub.d/40_custom - Inside the 40_custom file enter the following:
1
2
 set superusers = "bootroot"
 password_pbkdf2 bootroot grub.sha512.10000.........
- Run the following to update the grub:
1
 update-grubb
Congratulations
You have now successfully configured an Ubuntu 20.04 machine to be NIST 800-171 compliant!