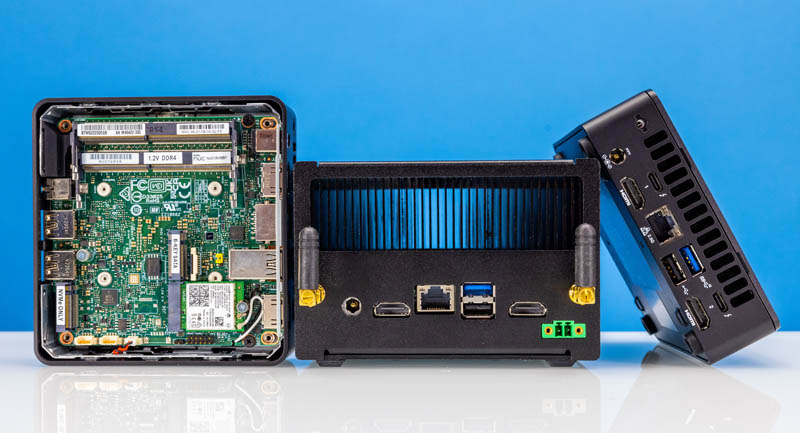
A glance into my HomeLab
Why HomeLab?
During my time at Florida Atlantic University, I had the chance to gain hands-on experience in a hypervisor environment. Although my permissions and scope were limited, I was captivated from the start. To safely explore and learn about hypervisors, virtual machines, Linux, networking, and more, I decided to set up my own HomeLab.
Hardware and Software
To start my HomeLab I picked up a 12th generation Intel NUC (NUC12WSKi7) on eBay barebones for $535.
On the NUC I decided to run Proxmox VE 8.0.3.
Inside the NUC I have:
1
2
3
4
16 Core i7-1260P CPU
64 GB RAM
2 TB SSD (Data Volume)
512 GB SSD (Proxmox)
I decided to pick up a Raspberry Pi 4 Model B from CanaKit for $134.
On the Pi I decided to run VMWare vSphere 8.
Inside the Raspberry Pi 4 is:
1
2
3
4
4 core ARMv8 CPU
8 GB RAM
64 GB MicroSD (vSphere)
128 GB Flash Drive (Data Volume)
Initial Goals
Some of my initial goals, beyond learning to navigate and manage a hypervisor environment, included:
- Learning Linux
- Working exclusively with the CLI to become more familiar with Bash
- Learning Docker
- Learning Docker Compose and how to write .YML files
- Setting up home game servers for my friends and me to play on
I have successfully achieved many of these goals and have now shifted my focus to learning Kubernetes and Ansible. I aim to automate my entire HomeLab with playbooks and potentially achieve high availability capabilities if I add more nodes in the future.
Virtual Machines and their use cases
After setting up my initial Proxmox node and data volumes I created the following VM’s:
- pihole
- portainer
- media
- game-server
PiHole
The first thing I did after setting up Proxmox was create a PiHole LXC container directly within Proxmox.
This was important to set up first, as I planned on using PiHole as my HomeLabs DNS server to both block adds and allow for setting up a reverse proxy with traefik.
Portainer
In this VM I am running Ubuntu 20.04 LTS headless.
I installed Docker and Docker Compose and used the following .YML file to spin up my portainer instance.
1
2
3
4
5
6
7
8
9
10
11
12
13
14
15
16
17
18
19
20
21
22
23
24
25
26
27
28
29
30
31
version: '3'

services:
  portainer:
    image: portainer/portainer-ce
    container_name: portainer
    restart: unless-stopped
    security_opt:
      - no-new-privileges:true
    networks:
      - proxy
    volumes:
      - /etc/localtime:/etc/localtime:ro
      - /var/run/docker.sock:/var/run/docker.sock:ro
      - /home/your_username/portainer/data:/data
    labels:
      - "traefik.enable=true"
      - "traefik.http.routers.portainer.entrypoints=http"
      - "traefik.http.routers.portainer.rule=Host(`portainer.your.domain.com`)"
      - "traefik.http.middlewares.portainer-https-redirect.redirectscheme.scheme=https"
      - "traefik.http.routers.portainer.middlewares=portainer-https-redirect"
      - "traefik.http.routers.portainer-secure.entrypoints=https"
      - "traefik.http.routers.portainer-secure.rule=Host(`portainer.your.domain.com`)"
      - "traefik.http.routers.portainer-secure.tls=true"
      - "traefik.http.routers.portainer-secure.service=portainer"
      - "traefik.http.services.portainer.loadbalancer.server.port=9000"
      - "traefik.docker.network=proxy"

networks:
  proxy:
    external: true
I might dive deeper into my Traefik reverse-proxy configuration in another blog post.
Media
In this VM I am running TrueNAS Core to section off data storage specifically for my photo, video, and media libraries.
I am also running Jellyfin as a container within TrueNAS Core to provide media streaming capabilities to all my computers and TV’s connected to my home network.
Game-Server
The last VM I created was my ‘game-server’ VM, which I decided to run headless on Ubuntu 20.04 LTS.
My friends and I play a lot of Minecraft and wanted to stop paying for realms or dedicated servers. So, I installed Java and configured this VM to run a dedicated Minecraft server.
Within this VM, I wrote scripts to perform daily server restarts and backups to ensure performance and reliability.
After successfully setting up the server, I faced the challenge of allowing my friends outside my home network to connect to it safely. I didn’t feel comfortable port forwarding my router and am quite proud of the solution I devised.
Initially, I decided to use Tailscale as an easy-to-use VPN to allow my friends to connect to the server. However, Tailscale is only free for personal use. I discovered a workaround by creating a GitHub organization, inviting my friends, then signing into Tailscale with GitHub and selecting the organization. This allows me to invite as many friends as I want to the organization and provide them with VPN access to the server. To enhance security, I also ensured all users in the organization have 2FA configured.
Conclusion
This has been a broad overview of how I’ve utilized my HomeLab for personal use and learning. I highly encourage anyone thinking about setting up a HomeLab to go for it. You can achieve almost everything I’ve done with any functional spare computer. Thank you for reading, and if you have any questions, feel free to reach out!
